Calyx M Music Transfer Apple Mac & Windows PC

CONNECT VIA:
Apple Mac
Note: before adding music to the Calyx M you must turn on the device and then plug it into your computer. A message will appear on the Calyx device asking you to choose the USB Connection Type. Choose File Transfer.
There are two ways to get the music from your Apple Mac to the Calyx M: Android File Transfer Method or External SD Card Method.
Both of these methods require the use of Mac Finder which is similar to Windows Explorer.
Android File Transfer
How to install:
Android File Transfer
- Download Android File Transfer
- Open androidfiletransfer.dmg
- Drag Android File Transfer to Applications folder


Once Android File Transfer is downloaded you can easily drag and drop your music files to the Calyx M player or connected external memory card.
Note: SD card needs to be formatted in “FAT32” or “NTFS”
- Connect Calyx M to your Mac computer. Android File Transfer will open automatically showing you all of the files on you Calyx M music player.

- Open a Finder folder and locate the music you want transferred.
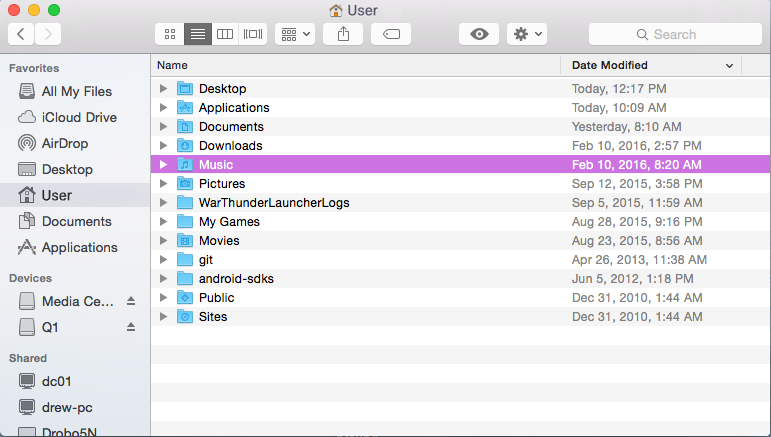
Note: iTunes will not directly sync you the Calyx M music player. To add your iTunes library to the Calyx M, you have to locate it in finder under User/Music/iTunes/iTunes Media/Music.


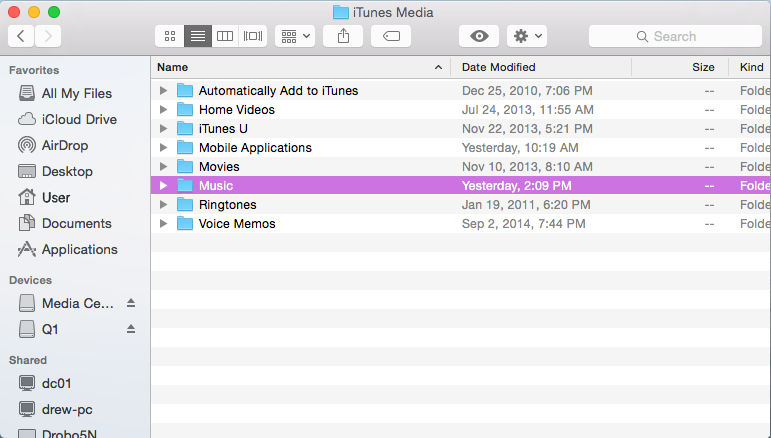
- Here you will find a list of the artists located in your iTunes library.
- If you have other music, like high resolution files, you can generally find them under the first Music folder of your Mac user account.
Once you locate the music you want to import onto your Calyx M music player, drag and drop the specific folders for artist, individual albums, or individual song tracks into the music folder of the Calyx M device in Android File Transfer.

-
You can also transfer music to the SD card connected to your Calyx M device by selecting "SD card" at the top of the Android File Transfer screen.

-
External SD Card
If you choose not to use the Android File Transfer program, the only way to get music to your Calyx M music player using a Mac is to add the music to an external SD card prior to inserting it into the music player.
Note: SD card needs to be formatted in “FAT32” or “NTFS”
First, insert the SD card into your Apple Mac and locate it on the left panel of an open Finder screen.

Open a second Finder screen and locate the music on your computer.

Drag and drop your music from Finder to the SD card.

- After you have transferred all of your music, eject the SD card and insert it into the Calyx M music player.
Windows Computers
Note: before adding music to the Calyx M you must turn on the device and then plug it into your computer. A message will appear on the Calyx device asking you to choose the USB Connection Type. Choose File Transfer.
In general, Windows based platforms tend to be a little more accepting of various digital audio players like the Calyx M and Astell & Kern Music Players.
There are also two ways to transfer music from your Windows PC to the Calyx M music player. You can use JRiver or the Windows Explorer applications.
JRiver Media Center
JRiver is a very intuitive program to store and catalog all of your music including the high resolution files you download from HDtracks. If you are at all familiar with Apple iTunes, learning JRiver will be quick and simple. Unfortunately, JRiver does not recognize the Calyx M music player on a Mac computer, so this only works for Windows.
- Open JRiver. To download JRiver click here
- Plug Calyx M into the USB port of your Windows PC.
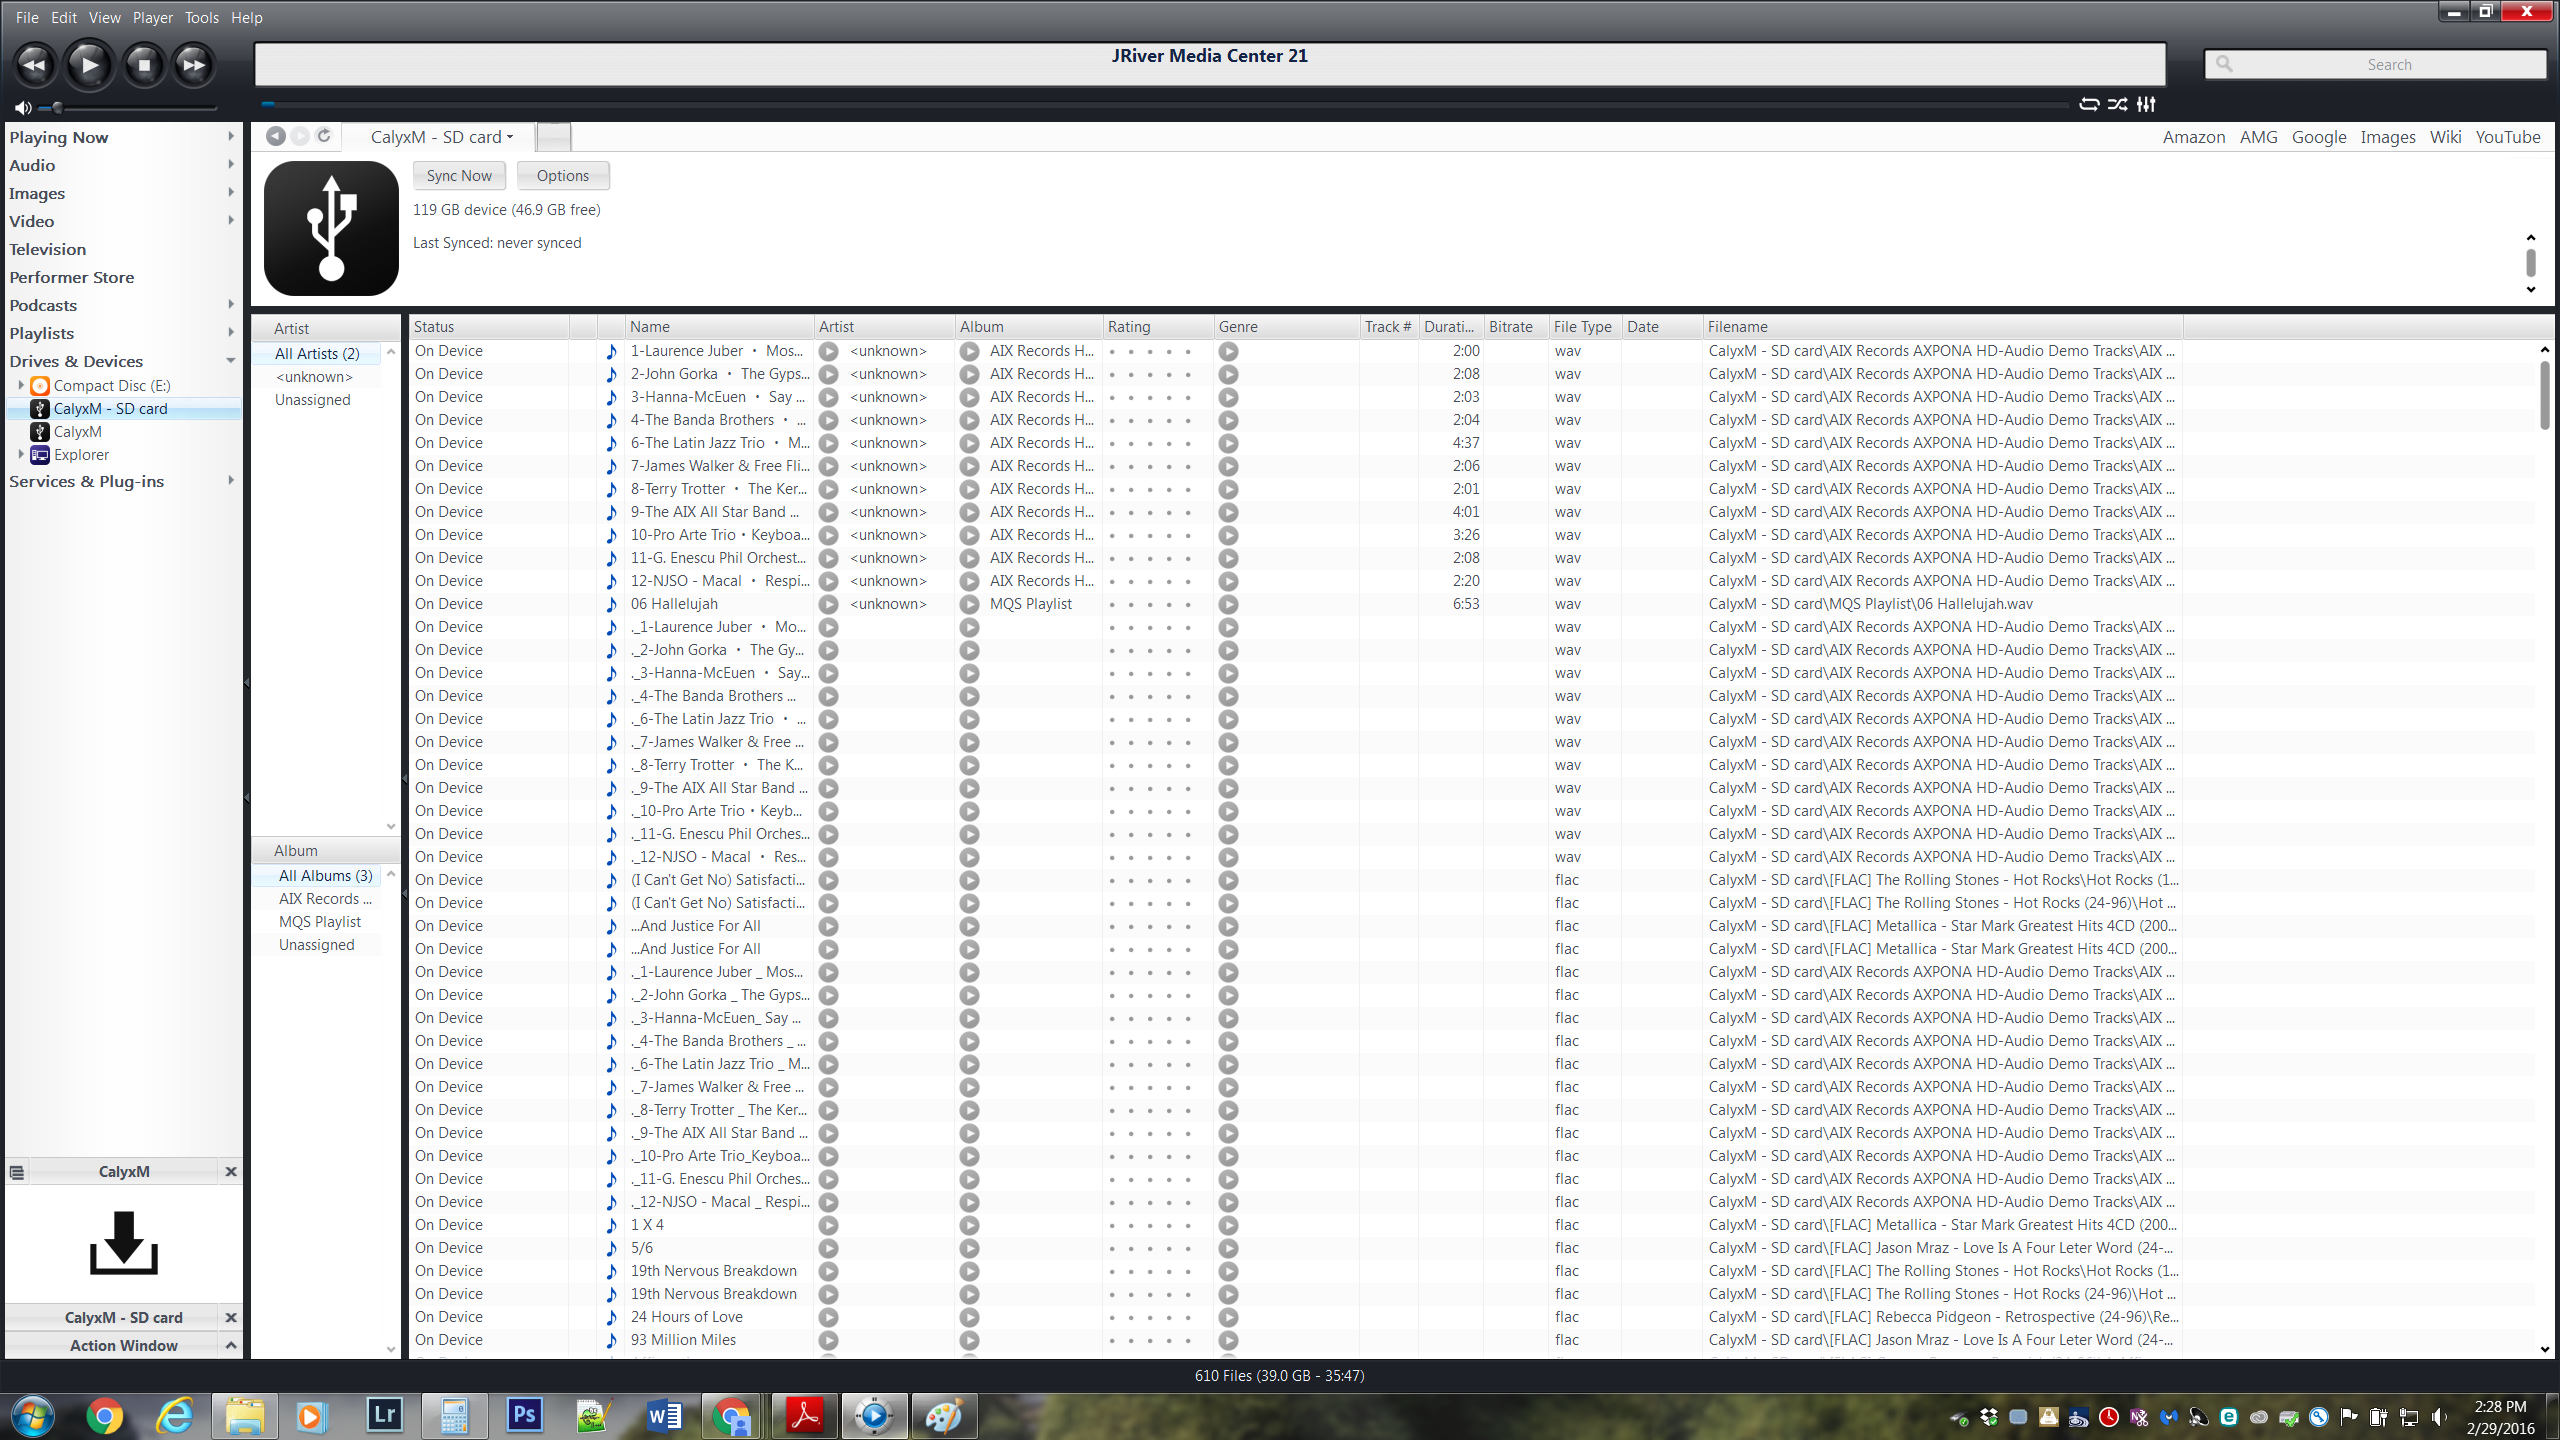
The Calyx M if properly connected will show up in the devices list on JRiver and you will be able to click on the device to browse the files.

If you are connecting the Calyx device for the first time you will see a blank screen where your files will be stored.

You can also choose the external SD card to sync music.
- Syncing entire JRiver library
To import your entire JRiver library click the options or sync now button.

Note: if you click the Sync Now button instead of the options button you will get the following message. Just click Yes.

- Select "All Audio" under Media Types on the right. On this screen you will have complete customizable control of the audio files that you want on your Calyx device. Click OK once you are done.

- Click the "Sync Now" button to import entire JRiver library.
- Syncing select artists, albums, genres or songs
On the left side of the JRiver screen under audio you will see a way to view your music catalog as albums, artists, files (songs) and genres. If you want to import only select files onto the Calyx device you will have to use the following steps.

- Locate the artist, album, genre or song on JRiver.
- Right click on the file(s).
Hover over Send to > Drives & Devices > Choose Calyx M or Calyx M - SD Card (depending on your storage needs).
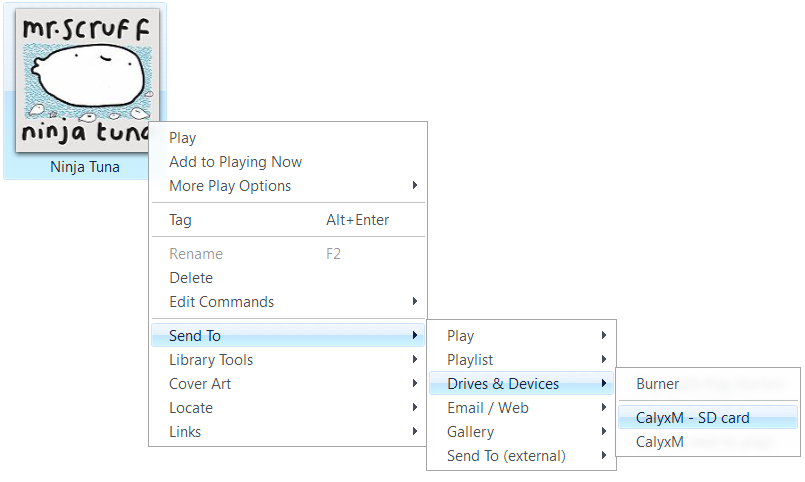
- You will see the device show up on the left with a transfer button.
If you have more than one artist, album, genre or song you want to include in the sync repeat the previous step until all the files are showing up in the "in Queue" list.
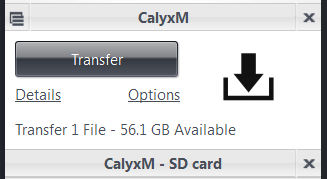
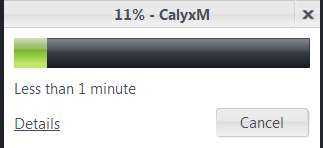
Once you are done sending all of the files you want to the Calyx M device, click transfer and the files will start to download onto your device.
If you want to double check that all of the artists are showing up, you can click on the details under the transfer button and it will pull up the Calyx M device. Here you can see all of the files that are on the device or "In Queue" to be synced to the device.

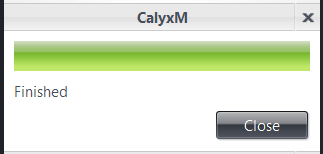
When you are done syncing press the close button and unplug your Calyx device from your Windows PC.
Creating Playlists with JRiver on Windows
The playlist feature will work with JRiver on Windows computers and laptops. Like Apple iTunes, JRiver acts as a cataloging system for your music and you can group specific artists or songs together to make playlists.
- First, start by creating a Playlist in JRiver.
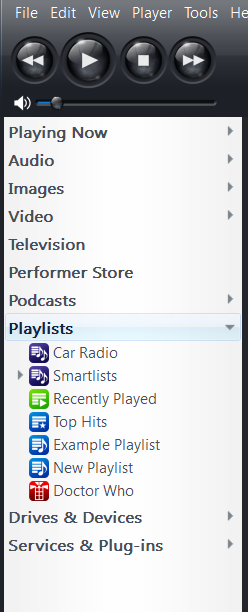
You do this by clicking on "Playlists" on the left column of the JRiver screen.
From this screen you can click "Add Playlist" to create a new playlist or manage your already existing playlists.
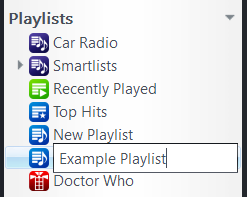
When you click "Add Playlist" a new playlist will pop up on the left column of JRiver and you will be able to name it.
Then, you can find the songs you want on the playlist and add them by right clicking on the song.
You then hover over Send To > Playlists > Click the playlist name you created. (You can also add new playlists through this method as well.)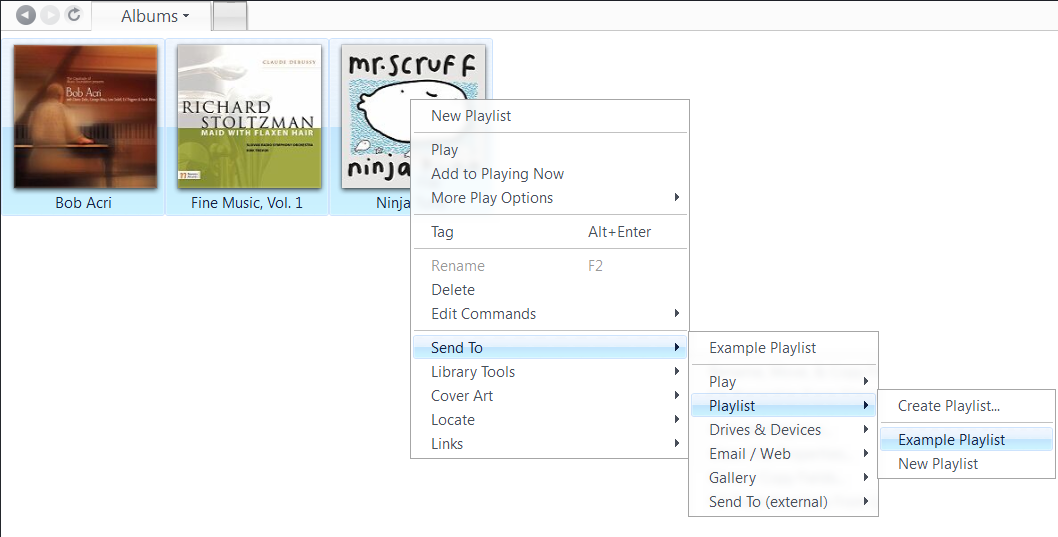
- Once you have all the songs you want on your playlist it is time to sync the Calyx M music player to the JRiver playlist. You do this by:
Click on the Calyx M device under Drives & Devices.
Click options to bring up the sync options box.

- Check the box beside the playlist you just created and click OK. This will allow you to add and remove songs from the playlist and have Calyx M automatically sync the updates when you press the Sync Now button.

Note: Whatever you name the playlist here is how it will show up on your Calyx M music player.
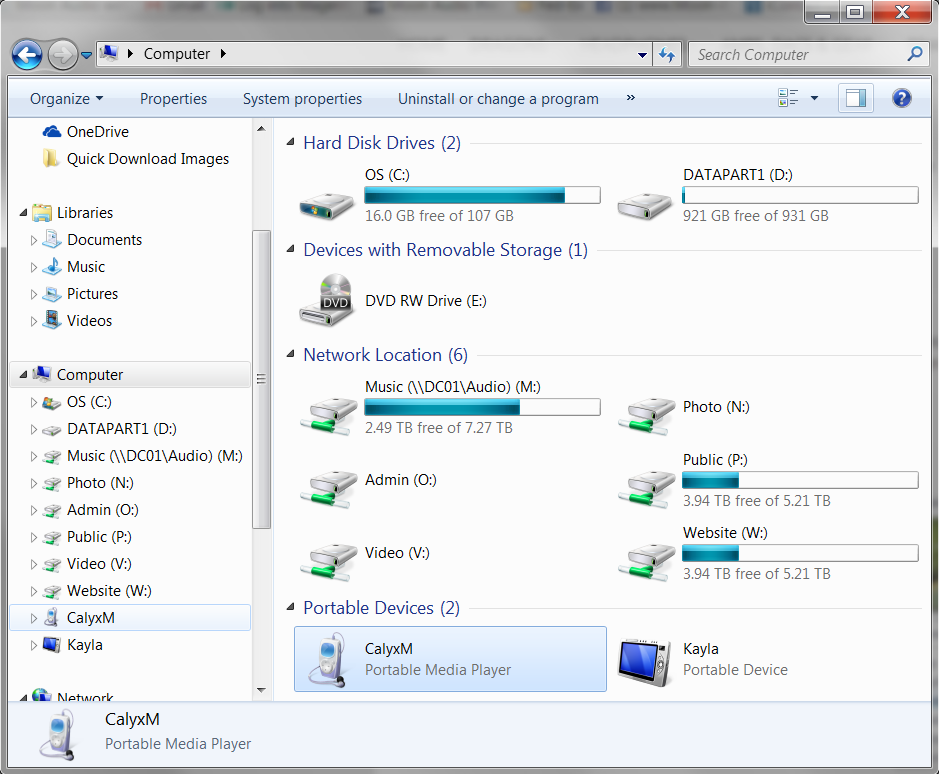
Windows Explorer
Another option in transferring music from your Windows PC to your Calyx M music player is to use the Windows Explorer folders.
Note: SD card needs to be formatted in “FAT32” or “NTFS”
Plug Calyx M into your computer.
Locate and open the Calyx M device folder under computer portable devices.
Here you will find the option to store music on the internal memory or the external SD card inserted into the device.

Open a separate Explorer folder and locate your music under your libraries folder.

Once you have found the music you want to transfer to the Calyx M drag and drop or copy the folders for artists, individual albums, or individual song tracks onto the internal or external folders for the Calyx M.

Or, you can transfer your music to the SD Card.

Once you are done transferring all of your music, eject the Calyx M from your computer.